Oh Happy Days!

(I have decided, even as I am writing this, that this post is going to be my favorite post I’ve done so far!)

I have been blessed with this amazing opportunity! I have been asked to give my opinion, sort of a review, for Graco’s new airless sprayer. I received this box from Graco’s a few weeks ago and I couldn’t stop smiling all day! I felt like a fat kid in a candy shop!

IMG_0286.JPG
Open it up, open it up!!

IMG_0282.JPG
The TrueCoat 360 DS by Graco. I’m told that this airless painter was specifically designed with the DIYer in mind, and believe me it did not disappoint. The painter is lightweight with a comfortable grip. The spray tip allows you to spray horizontally or vertically but wait, there’s more. The Graco TrueCoat 360 Ds has an exclusive FlexLiner Paint Bag System that not only makes set up and clean up easier it allows for spraying from any angle. Graco has also given the customer a choice of reusing the paint bag or just tossing it out.
The company boost that there is no need for thinning your paint and that a wide variety including oils based, paint and stains can be used with the airless paint sprayer. With this in mind I decided to use primer in the sprayer, the first time I used it.

IMG_0683-0.PNG

IMG_0684-0.PNG
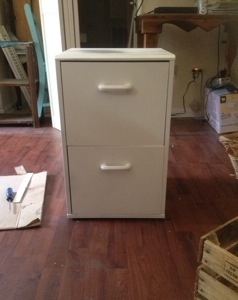
Well folks, our friends at Graco have done it again! My first coat of primer was even,smooth and with no drips!! You say I’m too EXCITED!! by the possibilities not to mention the doors this sprayer is going to open for me.
Here’s another look at the tables after they were sprayed a few days later with a Tiffany Blue color latex paint using the same paint bag I used when I primed them (with a light distressing).

IMG_0091-0.JPG The company suggests warm water or mineral water to clean the gun and bag after each use. The warm water worked for me with both the water based paint and primer. This picture was taken outside and is a little more truer to the actual color of the tables.

IMG_0238.JPG
The Graco TrueCoat 360 DS Airless Sprayer can be purchased from Lowes or online through Amazon. Believe me fellow DIYers this is a must buy for all your painting needs.
Thanks for stopping by.
❤️ Jackie

All opinions are my own. The TrueCoat 360 DS was sent to me by Graco to be reviewed. I received no monetary compensation from Graco.

Let’s Try This Again

Ok if you read my last post, you know my last post got deleted somehow. So let’s try this again.

I have a new obsession with Mantles. I actually attempted my first try at decorating my mantle for Halloween. You can read all about it here.

IMG_0638.JPG
I loved the way it turned out and I hated to take it down. I certainly didn’t want to leave it up til Thanksgiving though,so I decided to try it again. Here she is, all prettied up for Fall.

IMG_0472.JPG
This mantle cost me nothing to make. I just recycled a few mini pumpkins from Halloween, collected some leaves and pine cones from my yard, made a quick banner and printed out the Fall subway style print I found on Google Images. Not bad. I can’t wait to try my hand at a Christmas mantle.

IMG_0470.JPGThanks for stopping by! Please leave comment, follow, like and share!
❤️ Jackie

UPDATE
I added a few more things to my mantle. Check out the great black birds I got at Hobby Lobby for 80%.

IMG_0770.JPG

IMG_0772.JPG

IMG_0771.JPG

My (first) Halloween Mantel Reveal

Halloween is almost here! 🎃 Are you excited? I know I am. I love to see all the wonderful costumes, the happy little Gouls and Goblins 👻 trick or treating and ofcourse those scary Halloween decorations!
I did not do any decorating outside my house this year because I won’t be here to give out candy. My step daughter and myself are going to Home Depot for their trunk or treat! 🍬
I did decorate my mantel this year for the first time. It started out like this..
IMG_0177.PNG
I made the Trick or Treat sign with left over wood and my Cricut. The pumpkins are courtesy of the Dollar Store and the Boo plaque was made out of a plague that once said Home Sweet Home or something to that extent with birds and flowers ( think grandmas style ) that I also found at the Dollar Store.
It was a little boring to me and the more I looked at, the more it needed something.. I decided to add a banner I made from using printable banner letters I found over at Shanty2Chic’s blog here. I also added a cute print I found on Google Images and a cut out of a bat, also found on Google Images.

IMG_0178.PNG
Looks great! Of course I couldn’t leave well enough alone and I added some branches from my yard that I just spray painted black! Can you see them? What cha think?

IMG_0175-0.JPG
Thank you for stopping by! I hope you and the littles enjoy your All Hallows Eve!!
❤️ Jackie

World Market Sign Hack

I was looking through one of my favorite bloggers site, The Lettered Cottage,when came I across this post.

IMG_6825.JPG
I instantly fell in love with this sign. ❤️❤️❤️❤️
Layla found this handsome devil at World Market. While it was inexpensive and I could have just purchased one myself, I decided I could make one with items I already had on hand.
My sign started out as a herb picture that once hung in my Italian inspired kitchen years and years ago. I have two actually, basil and sage.

IMG_6814.JPG

I had been hoarding saving them for just the right project and I decided that this was it. I took the picture apart and primed my frame first.

IMG_6790.JPG
I took it ouside, grabbed some Krylon spray paint and gave it a few thin coats. ( I have no idea why this is blue. Smh )

IMG_6794.JPG

IMG_6793.JPG
After a few hours of letting it dry in the sun, I took my palm sander and distressed the frame.

IMG_6801.JPG
I cut out the words with my Cricut and applied them to the glass that came in the frame. I, of course, kept the original picture. I’m sure I can find a use for it, lol. I glued the glass to the frame with some liquid cement, I picked up at my local Dollar Tree.

IMG_6809.JPG

IMG_6819-0.JPG

IMG_6826.JPG
Layla didn’t like the wire hanger the picture came with so she ended up trading it out with some twine. It looks super cute. Don’t you just love her backsplash?

IMG_6827.JPG
I actually like the wonkeyness of the wire, unfortunately I have none on hand. I probably should have waited until I finished my sign but I was so excited how it’s turned out so far, I just couldn’t wait to post!
Thanks for stopping by!
❤️ Jackie

99.44 % Pure

I am so excited by this soap I found today at my local Dollar General for only, you guessed it, a dollar.

IMG_6771.JPG
I love the retro packaging! I have eczema so this soap is perfect for my sensitive skin. I don’t know why I just bought one today but I plan on stopping by there again tomorrow and buying them out,lol. Not only can my whole family use this but I can see it in a homemade gift basket in the near future!

IMG_6768.JPG

Sun Tea

If you’ve seen my sign, Sweet Tea Served Here then you know I love sweet tea. Some would say its so addicting it’s like liquid crack to some of us Southerners, lol.. If you haven’t seen my sign you can check out it here. My grandmother, who’s been on my mind lately, inspired my next project.

Sun Tea is something my grandmother made every summer, a family tradition if you would. I decided this summer I will carry on that tradition.
A lot of people grill outside during the summer, not only for the taste of BBQ but to keep our houses from getting any hotter than they already are. The same idea with Sun Tea. Instead of heating up the stove by boiling the water for the tea, we have learned to let the hot summer sun do all the work.
I started with a big ole pickle jar. I washed it several times by hand and then ran it through the dishwasher a few more. Nothing ruins tea then a hint of pickle taste in it, lol.

IMG_6474-0.JPG
Ofcourse I had to make it pretty, so I powered up my Cricut and got to work. I used my Plantin Schoolhouse cartridge an cut out the word Tea in black vinyl. I also used my Home Accent cartridge to cut out what I thought could pass for the sun, lol. Painted the lid with some green spray paint from my stash and she was ready to go.

IMG_6468.JPG

IMG_6467.JPG

IMG_6469.JPG
I placed 6 tea bags inside the jar and set it outside next to my Salsa Garden .

IMG_6470.JPG
Just an hour later and it looks ready. I will let it sit a few more hours before bringing her inside, adding a cup ( or 2 ) of sugar and popping her in the refrigerator.

IMG_6473.JPG
Thanks for stopping by!
❤️ Jackie

Quick update

We are in the process of changing our internet provider. The old internet and cable has already been cut off but the new provider won’t be here until Wednesday to hook up the new stuff. I previously tried to post a project called “Sun Tea” a few days ago. Unfortunately without the internet my phone uploads really slow and half of the post was lost 😞.
I have a few projects I have been working on the last few weeks that I am so ready to finish and post. Please be patient with me and I promise I will have them up within the next week!
Thanks for understanding!!
❤️ Jackie

IMG_6317.JPG

So Many Crates

Thursday was my Birthday!! 🎉Happy Birthday to me, happy birthday to me, happy birthday to Jackie, Happy Birthday to me🎉.
Ok now that, that is out of the way, on to this simple easy project I came up with over the weekend. ( Did I mention school started today? Yes school shopping all week last week.)
I know you have more than likely seen people using wooden crates to create furniture pieces all over the internet lately. It just so happens that my Dad has given me 10 or 11 wooden fruit crates that he had laying around. Two of these little gems are going to eventually be my new coffee table for the Den. I’m still trying to figure out what I’m going to do with the others. If you have any ideas I’d love to hear them. IMG_6337.JPG
After googling Crate ideas for a few hours, I finally decided to just put some wheels on one of those babies and call it a day. That’s exactly what I did. I save everything , so of course, I had some small caster wheels on hand .

IMG_6248.JPG
Two of the wheels were fixed and had a piece of metal sticking out of them so I couldn’t lay them flat. No problem, I just bent the protruding piece down and then screwed each wheel into one of the four corners.

IMG_6344.JPG

IMG_6245.JPG
I didn’t like my first placement of the fixed wheels so I took all the wheels off and traded them around a bit. Here she is so far. ( I plan on adding a pull of some kind. She does after all roll! )

IMG_6249.JPG

IMG_6250.JPG
Think I should paint her? Maybe add some graphics? I don’t actually know what I am going to use her for but I do plan on making more so stay tuned and thanks for stopping by. Comment, follow, like, share!!!
❤️ Jackie

Painting Laminate Furniture

So my office/craft-room, if I ever finish it, it’s going to be done in white and aqua with grey accents. It’s gonna be fabulous!! Right now I have 3 pieces of furniture in the room that need to be painted white. Today I decided to do just that with our file cabinet. The cabinet is a light pine wood color from some big box store that I actually acquired from an online yardsale. It is cute but not real wood. I just happen to know that you can not just paint starlight over laminate an expect it to stick. How do I know? Trial and error, lol.
I searched the web and came up on a great tutorial on how to paint laminate furniture on the Live Love Diy blog. You can check it out here. I followed Virginia’s tutorial but worked with the paint (spray paint) and primer (Kiltz) I had on hand.
Here she is before.20140804-192704-70024238.jpg
After I painted her with the Kiltz..

20140804-192747-70067891.jpg
Finished!!!

20140804-192817-70097028.jpg
I love the way she turned out. I decided not to change the handles but to just paint right over them the same way I did the rest of the cabinet.

20140806-172135-62495222.jpg
That is her permanent home in my office. As you can see she sits under another piece of furniture that I need to paint white. I hope to have that table and a dresser,I’m using for storage, painted in the next few weeks. Stay tuned and thanks for stopping by.
Please comment, share, like and follow..
❤️ Jackie

20140806-172424-62664557.jpg